
1.Vuex概述
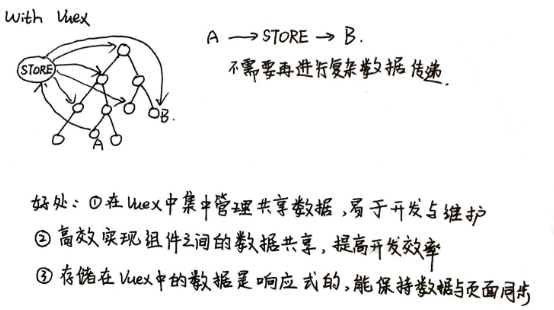
1.1 Vue组件之间共享数据
- 父向子传值:v-bind 属性绑定
- 子向父传值:v-on 事件绑定
- 兄弟组件之间共享数据:EventBus
$emit 发送数据的那个组件
$on 接收数据的那个组件
== 以上方式适用于小范围数据共享 ==
详情请见:【后续补充】
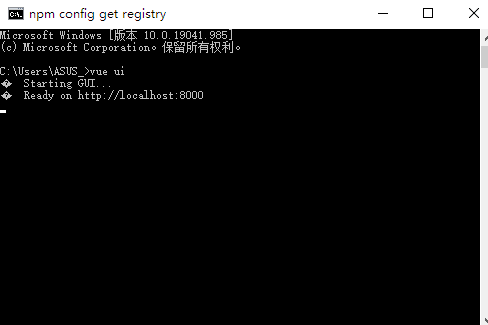
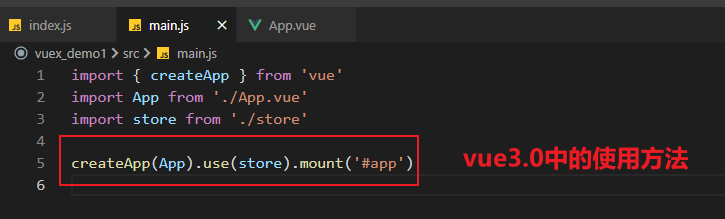
1.2 如何使用Vue UI创建项目?
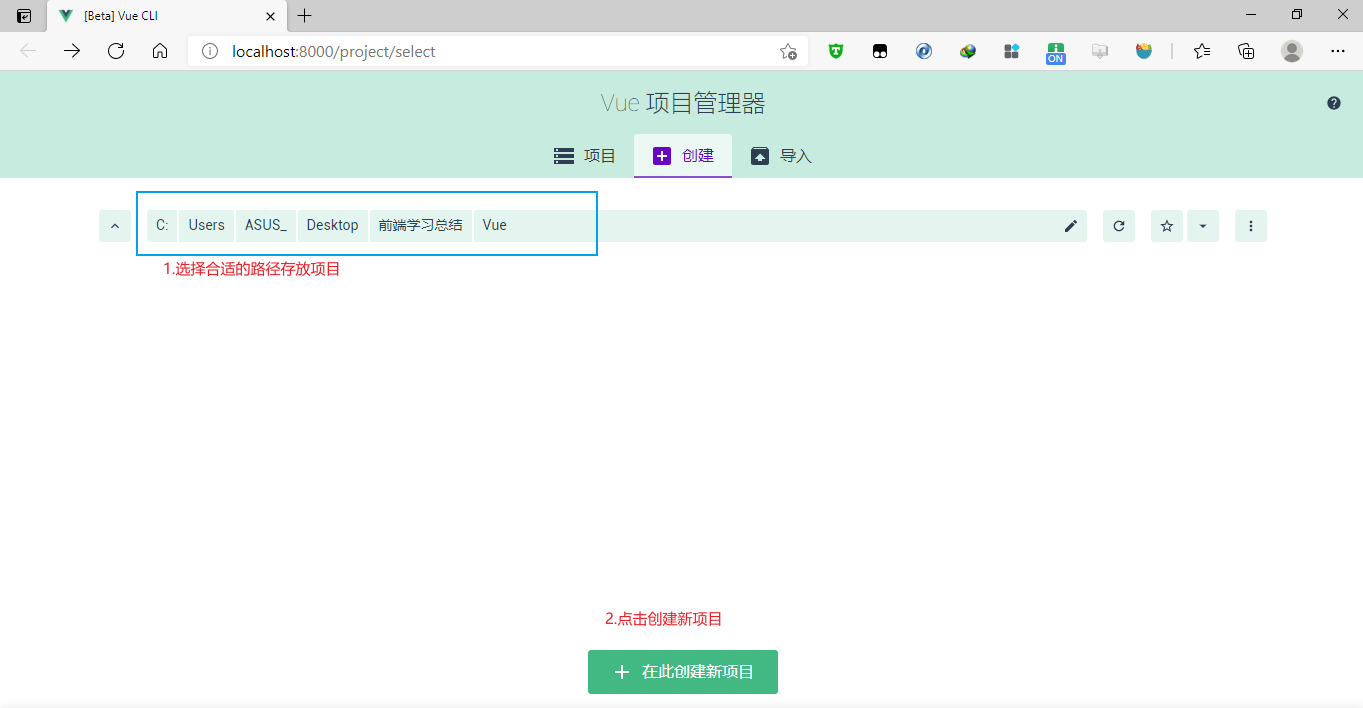
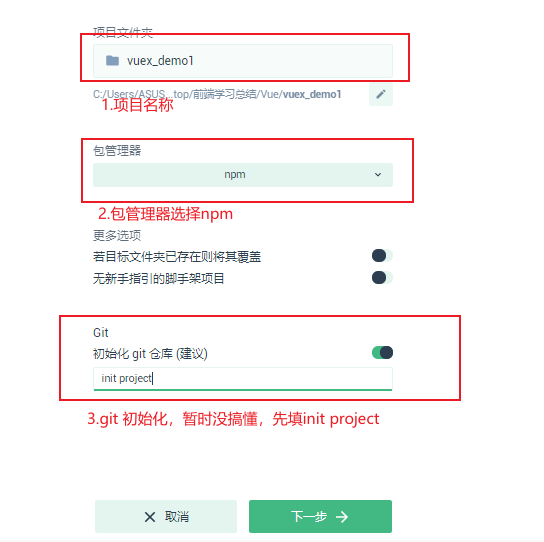

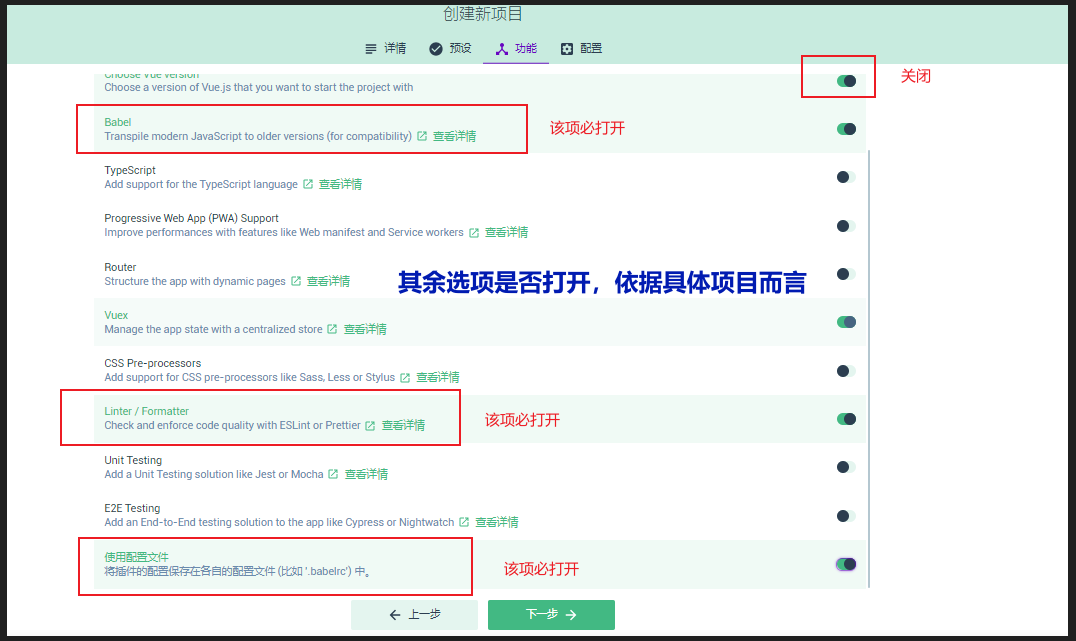
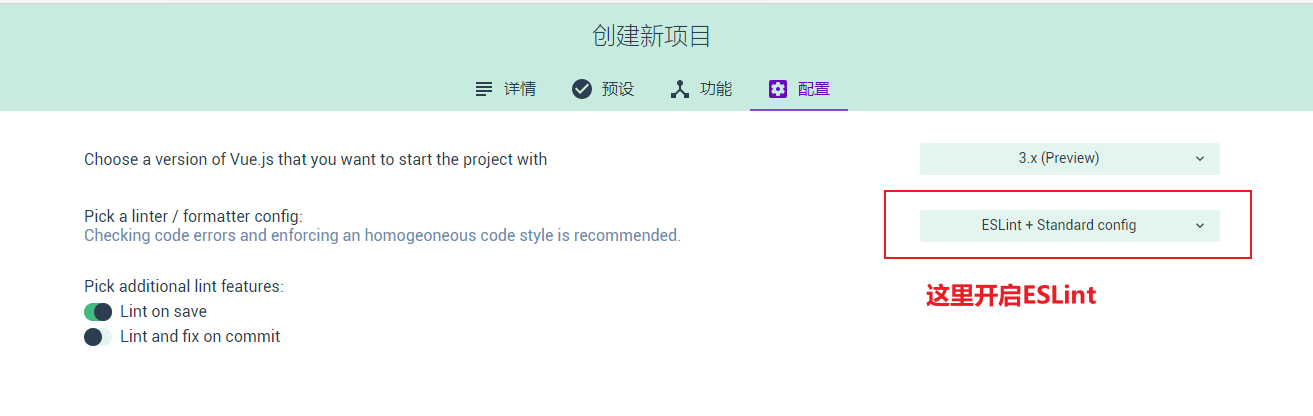
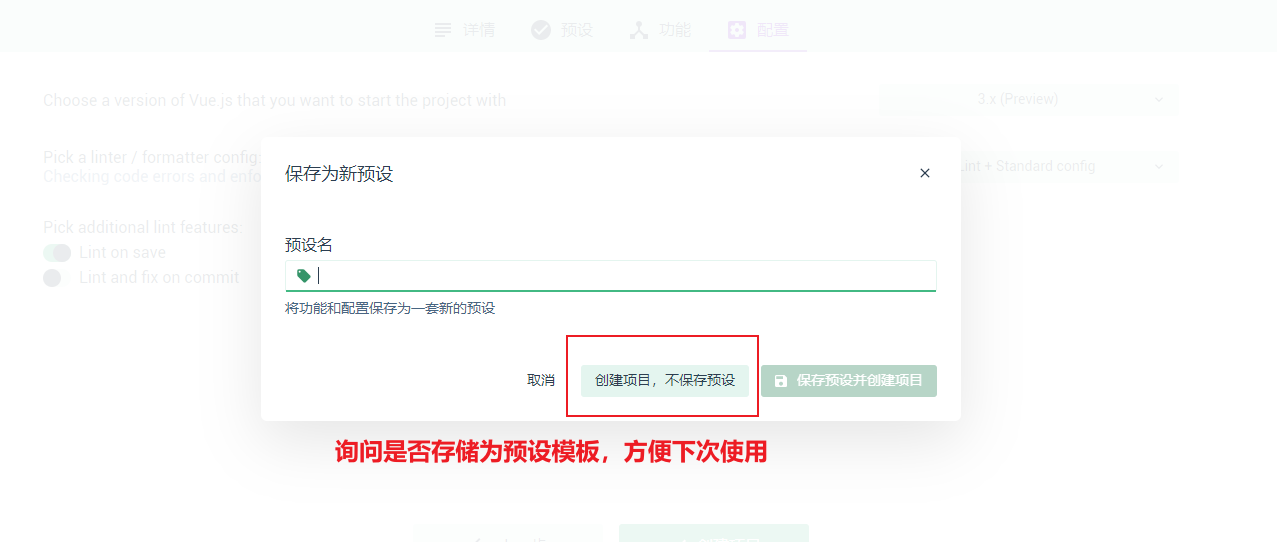
创建完成之后,到电脑目录下就可以查看到创建的项目,使用vscode打开即可
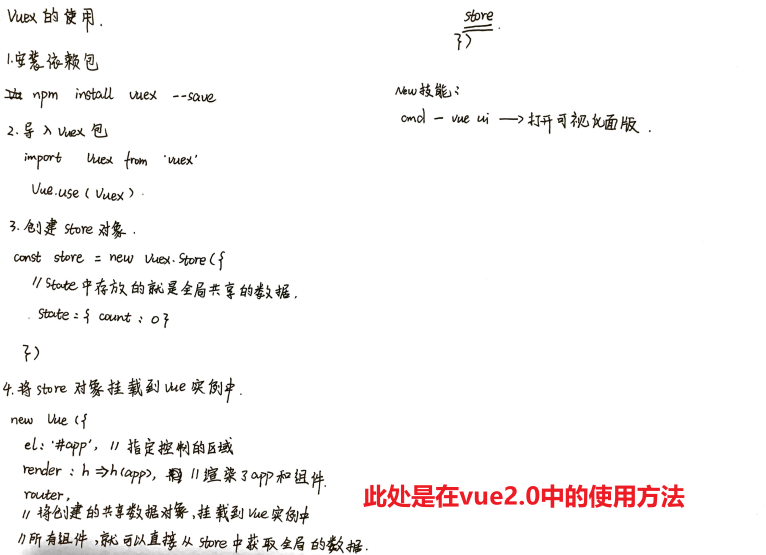
1.3 Vuex的使用
Vuex 是实现组件全局状态(数据)管理的一种机制,可以方便实现组件之间的数据共享,适用于大范围的数据共享。
1.4 Vuex知识点
Vuex中的核心概念
- State
- Mutation
- Action
- Getter
1.4.1 State
提供唯一的公共数据源,所有共享的数据都要统一放在Store的State中进行存储
1 | const store = new Vuex.Store({ |
组件访问state中数据的第一种方式:
1
this.$store.state.全局数据名称
组件访问state中数据的第二种方式:
1
2
3
4
5
6
7
8
9// 1.从Vuex中按需导入mapState函数
import { mapState } from 'vuex'
//通过刚才导入的mapState函数,将当前组件需要的全局数据映射为当前组件的computed计算属性
//2.将全局数据映射为当前组件的计算属性
computed:{
...mapState(['count'])
// ...表示展开运算符,意思是将全局数据映射为当前组件的计算属性
}Vuex中不允许组件直接修改Store中的数据
1.4.2 Mutation
用于变更Store中的数据,mutation 必须是同步函数
①只能通过Mutation变更store数据,不可以直接操作store中的数据
②通过这种方式虽然操作起来繁琐一些,但是可以集中监控所有数据的变化
1 | const store = new Vuex.Store({ |
- 组件中触发mutation的第一种方式:
1
2
3
4
5methods:{
handle(){
this.$store.commit('add')
}
} - 组件触发mutation的第二种方式:
1
2
3
4
5
6
7
// 1.从vuex中按需导入mapMutations函数
import { mapMutations } from 'vuex'
// 通过刚才导入的mapMutations函数,按需要的mutations函数映射为组件的methods方法
methods:{
...mapMutations(['add'])
// 将 `this.add()` 映射为 `this.$store.commit('add')`
}
可以在触发mutations时传递参数
1 | const store = new Vuex.Store({ |
1 | methods:{ |
上述第二种方法,使用时采用如下方法传递参数:
1 | <button @click="addN(5)">+5</button> |
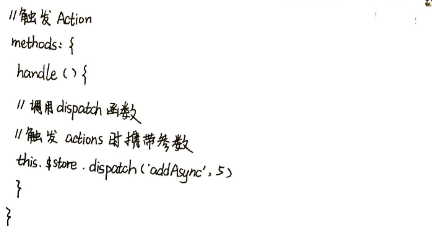
1.4.3 Action
用于处理异步任务
如果通过异步操作变更数据,必须通过Action,而不能使用Mutation,但是在Actions中还是要通过出发Mutation的方式间接变更数据
1 | const store = new Vuex.Store({ |
- 组件中触发action的第一种方式:
1
2
3
4
5methods:{
handle(){
this.$store.dispatch('addAsync')
}
} - 组件中触发action的第二种方式:
1
2
3
4
5
6
// 1.从vuex中按需导入mapActions函数
import { mapActions } from 'vuex'
// 通过刚才导入的mapActions函数,按需要的acyions函数映射为组件的methods方法
methods:{
...mapActions(['addASync'])
}
与1.4.2Mutation中相同,也可以携带参数
1.4.4 Getter
Getter用于对Store中的数据进行加工处理形成新的数据.(Getter不会修改State中的数据,只起到包装的作用)
特点:
1.Getter可以对Store中已有的数据加工处理之后形成新的数据,类似Vue的计算属性
2.Store中的数据发生改变,Getter的数据也会跟着变化
1 | // 定义 Getter |
- 使用getters的第一种方式:
1 | this.$store.getters.名称 |
- 使用getters的第二种方法
1
2
3
4
5import { mapGetters }from 'vuex'
computed: {
...mapGetter(['showNum'])
}
2.Vuex小Demo
Demo效果图: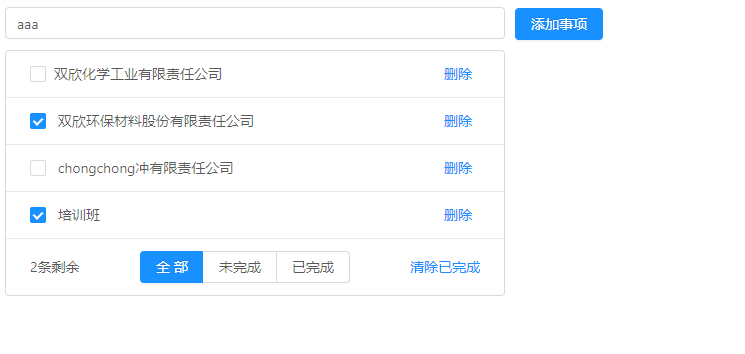
Demo业务流程图: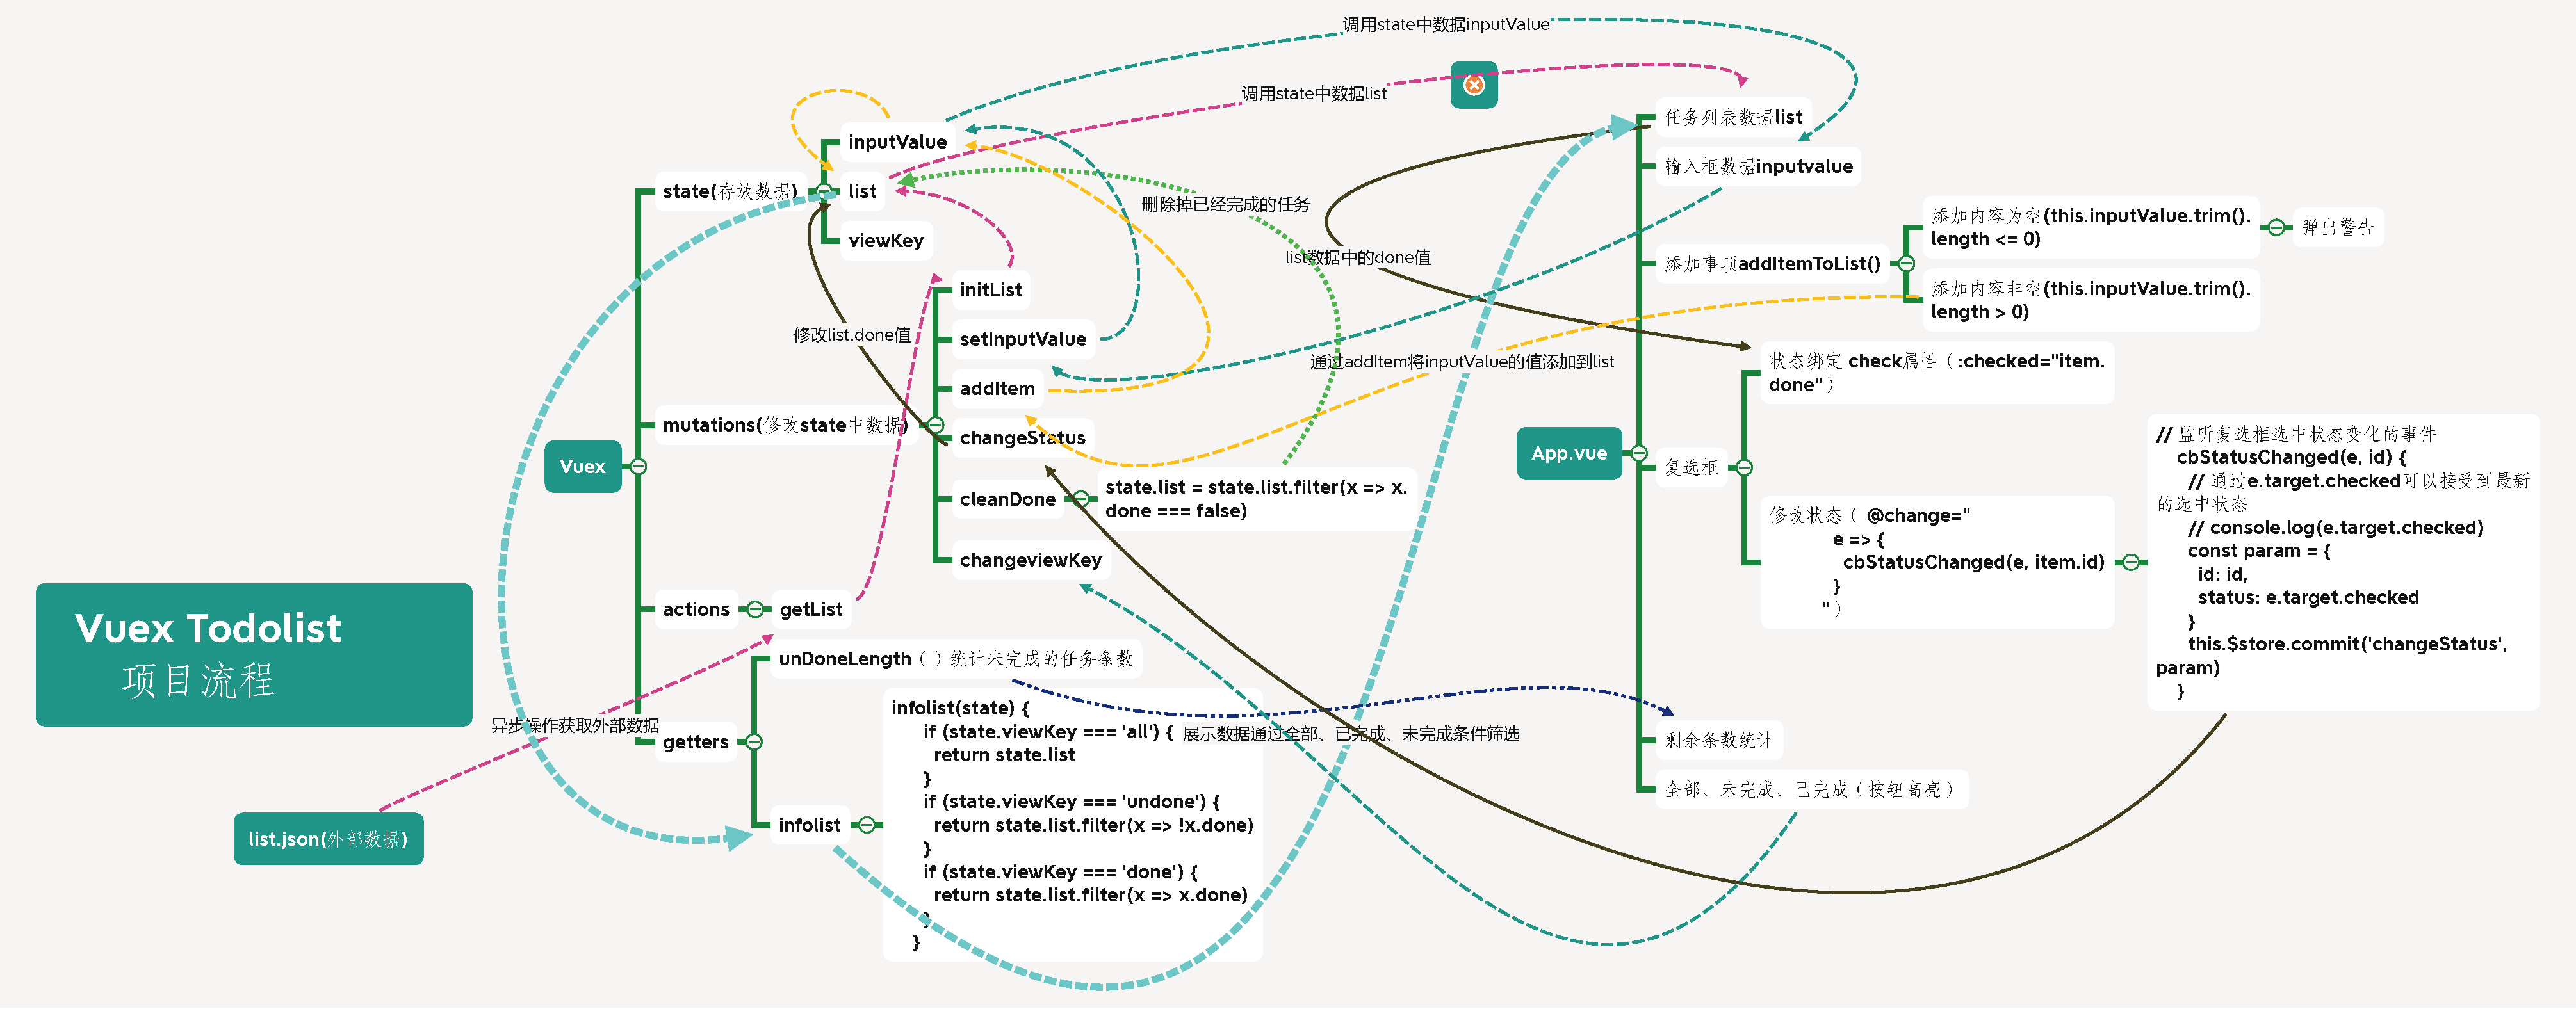
Demo地址:
VuexToDoListDemo